Best Ever No Bake Cheesecake—just saying it makes my dessert-loving heart skip a beat. There’s something wildly satisfying about whipping up a rich, creamy cheesecake without even touching the oven. It’s like cheating, but in the best possible way. This Best Ever No Bake Cheesecake is the dessert equivalent of that cozy blanket you reach for after a long day—comforting, indulgent, and ridiculously easy. No water baths, no cracks, no stress—just pure, velvety bliss layered on a buttery graham cracker crust.
The middle? Silky smooth and slightly tangy, with a hint of vanilla that ties everything together. Whether you’re making it for a holiday dinner, a summer picnic, or a random Wednesday because you deserve it (and you do), this recipe will have everyone thinking you spent hours in the kitchen. And spoiler alert—you didn’t. Stick around, because by the time we’re done, you’ll be making this Best Ever No Bake Cheesecake like a pro.
Table of Contents
What is Best Ever No Bake Cheesecake?
The Best Ever No Bake Cheesecake is that perfect combination of simplicity and decadence. Unlike traditional baked cheesecakes that demand oven time, water baths, and nerves of steel, this no-bake version relies on a whipped mixture of cream cheese, sugar, and heavy cream to create that dreamy, mousse-like texture. It sets beautifully in the fridge, holding its shape while staying unbelievably creamy.
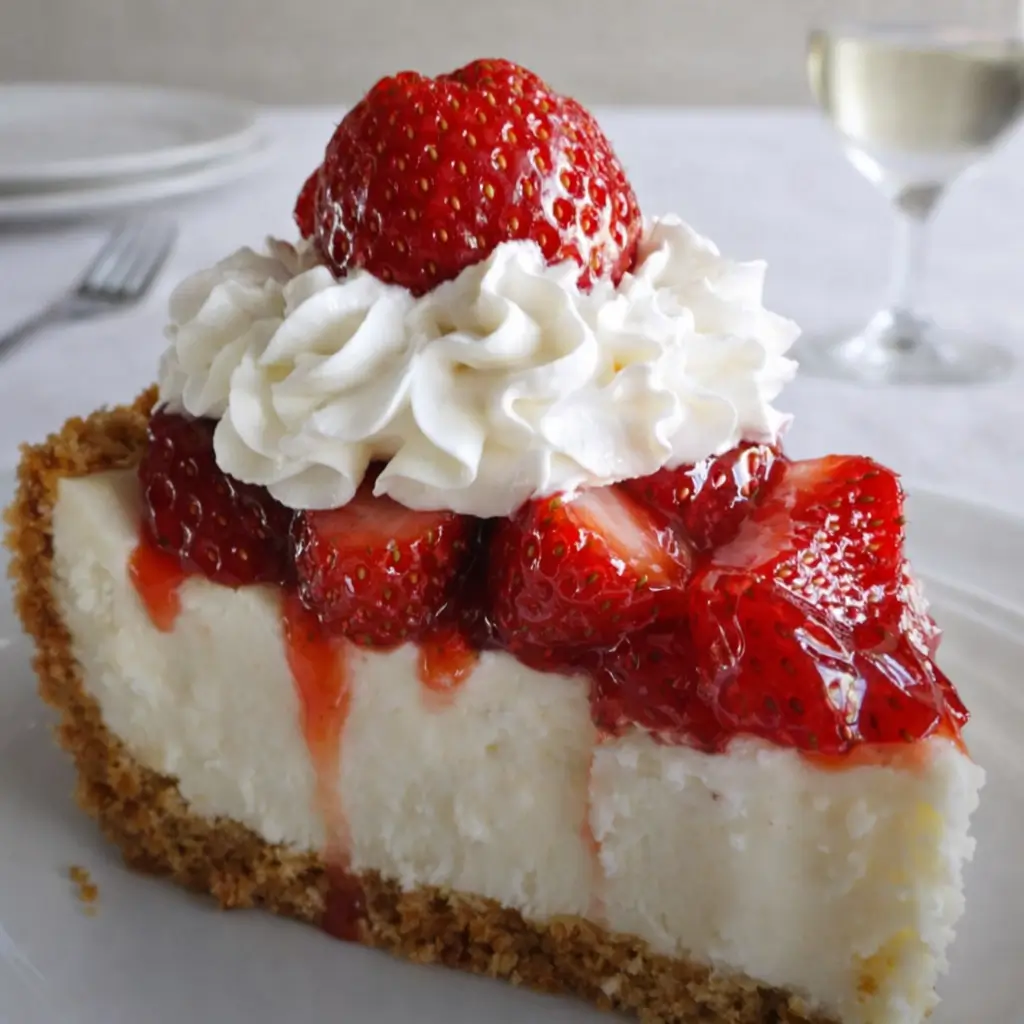
The crust is a blend of graham cracker crumbs, brown sugar, and melted butter—sweet, nutty, and just crumbly enough to complement the lush filling. Think of it as the classic New York cheesecake’s breezy, vacation-ready cousin. It’s effortless yet elegant, and when topped with whipped cream or fresh fruit, it easily becomes the star of any table.
Reasons to Try Best Ever No Bake Cheesecake
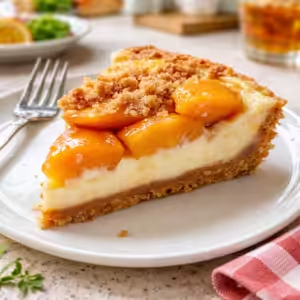
There are plenty of reasons to fall in love with this Best Ever No Bake Cheesecake, but let’s start with the most obvious—it’s easy. You don’t need to be a pastry chef or even own an oven. It’s the kind of dessert that fits seamlessly into a busy schedule. Have guests coming over? Make it the night before. Need a dessert for that potluck you forgot about until this morning? No problem. Second, it’s endlessly customizable. You can top it with strawberries, drizzle it with chocolate, or even spoon on a little mango sago mixture (check out this tropical recipe here).
Third, the flavor and texture? Unbeatable. It’s creamy without being too heavy, and that subtle hint of lemon gives it a fresh finish. Oh, and let’s not forget—it’s a crowd-pleaser. You’ll have people asking for the recipe, and maybe, just maybe, you’ll keep it your little secret.
Ingredients Needed to Make Best Ever No Bake Cheesecake
Here’s what you’ll need to bring this Best Ever No Bake Cheesecake to life:
For the Crust:
- 2 cups graham cracker crumbs
- ¼ cup brown sugar
- ½ cup (1 stick) unsalted butter, melted
For the Cheesecake Filling:
- 1¼ cups heavy whipping cream
- 2 (8-ounce) packages cream cheese, softened
- ¾ cup granulated sugar
- 2 teaspoons vanilla extract
- 2 teaspoons lemon juice
- ⅓ cup full-fat sour cream
- Optional toppings: whipped cream, fresh fruit, or pie filling
Instructions to Make Best Ever No Bake Cheesecake – Step by Step
Step 1: Create the Perfect Crust
Start by preparing your crust—the base that holds all that creamy goodness. In a medium bowl, combine graham cracker crumbs, brown sugar, and melted butter. Stir until everything’s coated and the mixture resembles wet sand. It should stick together when you press it between your fingers. This is where the magic begins. Pour the mixture into a 9-inch springform pan and press it firmly into the bottom using the back of a spoon or a flat-bottomed glass.
Make sure it’s even and compact—this ensures your crust won’t crumble when you slice your cheesecake later. Pop the crust into the fridge for about 15 minutes to firm up. This quick chill sets the butter, locking the crust into place.
Step 2: Whip the Cream Like a Pro
Now for that cloud-like texture—whipping the cream. Pour your cold heavy whipping cream into a chilled bowl. Using a hand or stand mixer, beat on medium-high speed until stiff peaks form. This means when you lift your beaters, the cream stands tall and proud. Be careful not to over-whip or you’ll end up with butter (which, let’s face it, is delicious but not what we need here). Once whipped, set it aside in the fridge to keep cool.
Step 3: Make the Silky Cream Cheese Base
In another large bowl, beat the softened cream cheese and granulated sugar together until smooth and creamy. No lumps allowed here—it should look glossy and velvety. Add the vanilla extract, lemon juice, and sour cream, then mix again until fully blended. The lemon juice brightens the flavor, while the sour cream adds that subtle tang that balances the sweetness beautifully. You’ll notice the texture start to resemble a thick, luscious frosting—that’s exactly what you want.
Step 4: Fold in the Whipped Cream
Here’s where your patience pays off. Gently fold the whipped cream into the cream cheese mixture using a spatula. Don’t stir aggressively—you want to preserve all that airy volume you just whipped up. Use long, gentle strokes from the bottom up, turning the bowl as you go. This Step by Step method is key to achieving that perfectly light and creamy consistency. The final mixture should be smooth, fluffy, and irresistible. Honestly, it’ll take some willpower not to grab a spoon right then and there.
Step 5: Assemble and Smooth
Once your filling is ready, grab the chilled crust from the fridge. Spoon the cheesecake mixture over the crust and smooth the top with a spatula or the back of a spoon. For that bakery-perfect finish, run a knife or offset spatula around the top in small circular motions to even it out. It’s oddly satisfying—like frosting a cake but easier. If you’re feeling fancy, tap the pan gently on the counter to release any air bubbles.
Step 6: Chill to Set
This is where the magic happens. Cover your cheesecake with plastic wrap or foil and refrigerate it for at least 4 hours—or overnight if you can resist. The chilling process allows the cheesecake to firm up, creating that creamy yet sliceable texture that defines the Best Ever No Bake Cheesecake. The longer it chills, the better the flavor marries together.
Step 7: Garnish and Serve
After chilling, release the cheesecake from the springform pan by running a thin knife around the edges. Carefully lift away the sides of the pan. Now comes the fun part—decorating! Top your cheesecake with a swirl of whipped cream, a layer of fresh strawberries, or a drizzle of berry compote. For something tropical, try a dollop of pineapple topping or check out these mini pineapple upside-down cheesecakes for inspiration. Slice, serve, and enjoy that first melt-in-your-mouth bite. Each forkful is creamy, cool, and slightly tangy—just perfection.
What to Serve with Best Ever No Bake Cheesecake
This cheesecake pairs beautifully with fresh fruit, coffee, or even a glass of sparkling wine for a touch of elegance. If you’re serving a crowd, try pairing it with light and refreshing sides like strawberry cheesecake bites or a sweet fruit salad. For a more indulgent twist, drizzle chocolate ganache or caramel sauce over each slice. It’s also fantastic alongside a savory main course like lemon pepper baked chicken breast for a full, balanced meal.
Key Tips for Making Best Ever No Bake Cheesecake
- Use Full-Fat Ingredients: This isn’t the time to go light. Full-fat cream cheese, sour cream, and heavy whipping cream give you that rich, creamy texture.
- Soften the Cream Cheese: Cold cream cheese won’t blend smoothly and can leave lumps. Take it out 30 minutes before starting.
- Chill Properly: Four hours is the bare minimum—overnight is better. The longer it sets, the cleaner your slices will be.
- Press the Crust Firmly: A loose crust will crumble when you cut into it. Use a flat-bottomed glass for even pressure.
- Don’t Skip the Lemon Juice: It enhances the flavor and helps balance the sweetness.
Storage and Reheating Tips for Best Ever No Bake Cheesecake
Though there’s little chance of leftovers, if you do have some (lucky you!), here’s how to keep it perfect. Store your cheesecake covered in the refrigerator for up to 3 days. If you’ve topped it with fruit or whipped cream, it’s best to store those separately and add them fresh before serving. For longer storage, you can freeze individual slices—wrap each one tightly in plastic wrap, then aluminum foil, and place in an airtight container. When you’re ready to enjoy, thaw in the fridge overnight. Don’t try to “reheat” this cheesecake—remember, it’s no-bake! Just chill and serve.
FAQs
Q: Can I make this cheesecake ahead of time?
Absolutely! In fact, it’s better that way. The flavor improves as it sits in the fridge overnight.
Q: What if I don’t have a springform pan?
No worries—use a deep-dish pie pan or even small mason jars for a cute individual version.
Q: Can I use store-bought crust?
Totally fine. It’s all about convenience, and it’ll still taste delicious.
Q: How do I make it chocolate-flavored?
Add ¼ cup of melted chocolate chips to the cream cheese mixture before folding in the whipped cream.
Q: Is there a dairy-free version?
Yes! Substitute with dairy-free cream cheese and coconut whipped cream. The texture stays smooth and creamy.
Final Thoughts
When it comes to easy, elegant desserts, the Best Ever No Bake Cheesecake is unbeatable. It’s the kind of recipe that makes you look like a kitchen genius with minimal effort. No oven, no stress—just pure dessert satisfaction. Whether you’re serving it plain, topped with fruit, or paired with something tropical like sticky pineapple chicken, it’s bound to steal the spotlight. Once you try it, this will become your go-to recipe for every occasion. So go ahead—grab your cream cheese, chill that crust, and treat yourself to a slice (or two). After all, dessert shouldn’t be complicated—it should be delicious.
Visit our Pinterest for regular slow cooker recipe updates, or join our Facebook discussions where cooking fans exchange their favorite hearty meal ideas.
Print
Best Ever No Bake Cheesecake: Creamy, Easy & Irresistible
- Prep Time: 20 minutes
- Cook Time: 0 minutes
- Total Time: 4 hours 20 minutes
- Yield: 1 (9-inch) cheesecake 1x
- Category: Dessert
- Method: No-Bake
- Cuisine: American
- Diet: Vegetarian
Description
A creamy, easy-to-make no-bake cheesecake with a graham cracker crust. Perfect for any occasion.
Ingredients
- FOR THE CRUST:
- 2 cups graham cracker crumbs
- 1/4 cup brown sugar
- 1/2 cup (1 stick) unsalted butter, melted
- FOR THE CHEESECAKE:
- 1¼ cups heavy whipping cream
- 2 (8-ounce) packages cream cheese, softened
- 3/4 cup granulated sugar
- 2 teaspoons vanilla extract
- 2 teaspoons lemon juice
- 1/3 cup full-fat sour cream
- Additional whipped cream and/or fresh fruit or pie filling (optional but recommended)
Instructions
1. Mix graham cracker crumbs, brown sugar, and melted butter in a bowl. Press firmly into the bottom of a 9-inch springform pan. Chill for 15 minutes.
2. Beat heavy whipping cream until stiff peaks form. Set aside.
3. In a separate bowl, beat cream cheese and sugar until smooth. Add vanilla extract, lemon juice, and sour cream. Mix well.
4. Gently fold the whipped cream into the cream cheese mixture until fully combined.
5. Spread the filling over the chilled crust. Smooth the top with a spatula.
6. Refrigerate for at least 4 hours or overnight until set.
7. Garnish with whipped cream and fresh fruit or pie filling before serving.
Notes
Use full-fat ingredients for the best texture.
Let the cheesecake chill thoroughly for the perfect consistency.
Store leftovers in the refrigerator for up to 3 days.
Nutrition
- Serving Size: 1 slice (1/12 of cheesecake)
- Calories: 320
- Sugar: 22g
- Sodium: 180mg
- Fat: 22g
- Saturated Fat: 13g
- Unsaturated Fat: 7g
- Trans Fat: 0g
- Carbohydrates: 28g
- Fiber: 0.5g
- Protein: 4g
- Cholesterol: 65mg