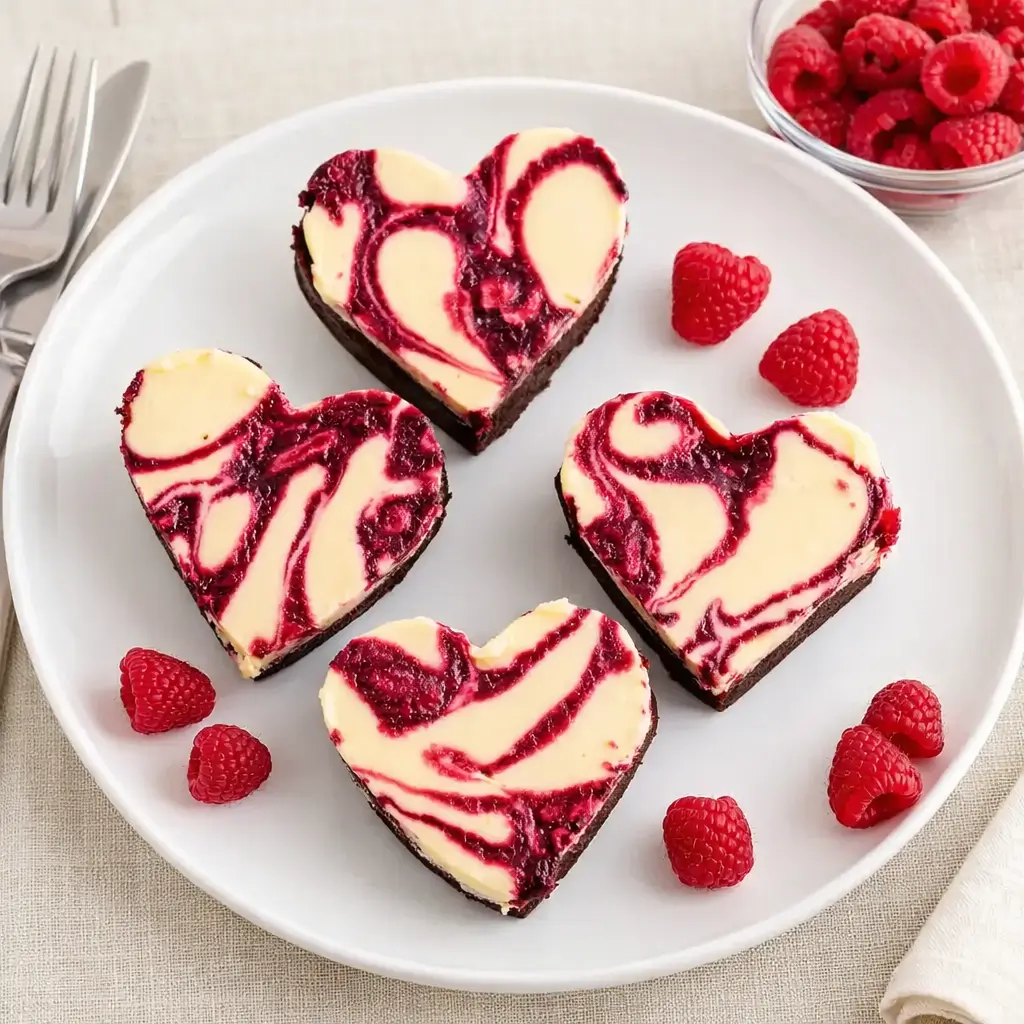
Heart Shaped Brownies aren’t just a dessert; they’re love baked into chocolate form. Whether you’re celebrating Valentine’s Day, an anniversary, or just need a “because you deserve it” treat, these fudgy brownies hit the sweet spot. Imagine biting into velvety chocolate layered with creamy cheesecake and a swirl of tangy raspberry sauce — it’s the kind of indulgence that feels like a warm hug after a long day. If you’ve ever wanted a simple yet show-stopping dessert that says “I made this with love,” this Heart Shaped Brownies recipe is your new go-to. And honestly, who needs Cupid when you’ve got brownies this good?
Table of Contents
What is Heart Shaped Brownies?
Heart Shaped Brownies are a charming twist on the classic fudge brownie, shaped into hearts for that extra touch of sweetness. What makes them stand out is the trio of textures — the rich chocolate base, the creamy cheesecake layer, and the tart raspberry swirl that keeps every bite balanced. This dessert isn’t just for February 14th; it’s a year-round favorite that fits birthdays, anniversaries, or even just self-care Saturdays. Think of it as your chocolate therapy — therapeutic to make, delightful to eat, and absolutely photo-worthy. For a dessert equally as beautiful and delicious, it’s right up there with these Cheesecake-Stuffed Red Velvet Cookies.
Reasons to Try Heart Shaped Brownies
If you need a reason to bake these Heart Shaped Brownies, I’ll give you three: chocolate, cheesecake, and raspberry. These brownies are rich yet balanced, fancy-looking yet simple to make, and guaranteed to make anyone swoon. They’re perfect for impressing your sweetheart, sharing with friends, or treating yourself after surviving a chaotic work week. The best part? You don’t need professional baking skills — just a heart-shaped cookie cutter and a craving for chocolate. Plus, they’re easy to make ahead and store, so you can bake love whenever the mood strikes. Need another reason? They pair beautifully with a cozy cup of coffee or a scoop of vanilla ice cream (trust me on that one).
Ingredients Needed to Make Heart Shaped Brownies
- 1 cup raspberries (fresh or thawed frozen)
- 1 tablespoon granulated sugar
- 1 teaspoon vanilla extract
- 8 oz cream cheese, room temperature
- ⅓ cup granulated sugar
- 1 large egg, room temperature
- ½ teaspoon vanilla extract
- 1 cup all-purpose flour (or gluten-free blend)
- ¾ cup Dutch-process cocoa powder, sifted
- ¼ teaspoon salt
- ¾ cup + 2 tbsp refined coconut oil or neutral oil
- 1½ cups granulated sugar
- 1 tablespoon vanilla extract
- 3 large eggs, room temperature
Equipment: mixing bowls, saucepan, electric mixer, 8×8 baking pan lined with parchment paper, and a heart-shaped cookie cutter.

Instructions to Make Heart Shaped Brownies (Step by Step Guide)
If you’ve ever wished for a foolproof way to bake a dessert that’s both rich and romantic, this Step by Step guide for making Heart Shaped Brownies will be your new favorite. Each stage walks you through the process carefully — from melting chocolatey magic to crafting those adorable heart shapes — so even beginner bakers can feel confident. Ready? Let’s bake love in every bite.
Step 1: Create the Raspberry Sauce (Step by Step Sweetness)
Start by preparing your tangy-sweet raspberry swirl — it’s what gives these brownies their signature pop of flavor and gorgeous marbled top. In a small saucepan, combine 1 cup of raspberries, 1 tablespoon of sugar, and 1 teaspoon of vanilla extract. Simmer the mixture over medium heat, stirring occasionally, for about 5–8 minutes. The raspberries will begin to break down, releasing their juices and thickening into a vibrant, syrupy sauce.
Once it’s slightly reduced, pour it through a fine-mesh strainer to remove the seeds — this gives your swirl that silky, seed-free finish. Set it aside to cool completely.
Pro Tip: If you love learning about quick sauce hacks, check out our Strawberry Cheesecake Truffle Balls — they use a similar fruit reduction technique for flavor-packed results.
Step 2: Make the Creamy Cheesecake Layer (Step by Step Perfection)
In a medium mixing bowl, beat 8 ounces of cream cheese and ⅓ cup of sugar until smooth and creamy. You can use a hand mixer or an electric stand mixer for this — whichever makes you feel like a baking pro. Once there are no lumps left, add 1 large egg and ½ teaspoon of vanilla extract. Beat again just until fully combined and the mixture looks silky.
This cheesecake layer adds a light, creamy contrast to the dense, chocolatey brownie base — think of it as the soft love note beneath all that fudge. For an extra touch, use room-temperature ingredients; cold cream cheese can make the batter lumpy.
If you’d like to learn more about working with cream cheese, check out our article on Cheesecake-Stuffed Red Velvet Cookies for more Step by Step creamy dessert inspiration.
Step 3: Mix the Brownie Batter (Step by Step Chocolate Bliss)
Now for the main event — the brownie base! In one bowl, whisk together 1 cup of all-purpose flour, ¾ cup of Dutch-process cocoa powder, and ¼ teaspoon of salt. This ensures your dry ingredients are evenly distributed and lump-free.In a separate larger bowl, combine ¾ cup plus 2 tablespoons of refined coconut oil (or your favorite neutral oil), 1½ cups of sugar, and 1 tablespoon of vanilla extract.
Whisk until everything looks glossy and well-blended. Add in 3 large eggs, one at a time, whisking after each addition to build that rich, fudgy texture.
Now, gently fold your dry ingredients into the wet mixture. The key is to mix just until combined — overmixing can lead to cakier brownies. You want that dense, melt-in-your-mouth bite.
Want to learn more about achieving the perfect brownie texture? Our Red Velvet Cake Mix Cookies post shares tips on balancing moisture and structure for bakery-worthy results.
Step 4: Layer, Swirl, and Make It Pretty (Step by Step Assembly)
Line your 8×8-inch baking pan with parchment paper, letting a little overhang for easy lifting later. Pour the brownie batter into the pan and spread it evenly with a spatula. Next, gently pour your cheesecake mixture on top of the brownie layer, spreading it until it covers the surface.
Now comes the fun part — grab your cooled raspberry sauce and spoon it over the cheesecake layer in small dollops. Using a skewer, butter knife, or even the handle of a spoon, gently swirl the raspberry sauce into the cheesecake. Move your hand in light, figure-eight motions to create elegant marbled patterns. Don’t overdo it; a few graceful swirls go a long way.
For extra Step by Step inspiration on layering and swirling, check out our creamy dessert techniques featured in Creamy Lemon Chicken Pasta — yes, even savory cooks love learning about balance and texture!
Step 5: Bake to Fudgy Perfection (Step by Step Baking Magic)
Preheat your oven to 350°F (175°C). Bake the brownies for 30–35 minutes, or until the center is just set but still slightly soft to the touch. A toothpick inserted into the center should come out with a few moist crumbs — not wet batter. That’s how you know they’re fudgy perfection.
Let the pan cool on a wire rack completely. Once cool, cover and chill in the refrigerator for at least 2 hours. This helps the layers set and makes cutting much easier later.
Step 6: Cut into Hearts (Step by Step Finishing Touch)
Once chilled, gently lift the brownies out of the pan using the parchment paper edges. Place them on a flat surface and grab your heart-shaped cookie cutter. Press firmly to cut out as many heart shapes as you can — you should get around nine medium hearts.
Wipe the cutter clean between each cut for sharp, neat edges. You can save the brownie scraps for snacking (chef’s treat) or crumble them over ice cream for a bonus dessert idea.
If you enjoy creative dessert shapes and presentation tricks, don’t miss our article on Slow Cooker Cowboy Potato Casserole; it includes practical Step by Step plating and serving ideas that apply beautifully to sweet treats too.
Step 7: Serve and Savor (Step by Step Sweet Reward)
Finally, it’s time to taste your masterpiece. You can serve your Heart Shaped Brownies as-is, dusted with powdered sugar, or topped with a drizzle of chocolate ganache for extra indulgence. Pair them with coffee, tea, or even a scoop of ice cream for that café-style experience.
If you’re planning a romantic dinner, these brownies make the perfect grand finale. Try pairing them after a cozy meal like French Chicken à la Normande — because dessert should always be the encore.
This Step by Step guide not only walks you through how to make Heart Shaped Brownies from scratch but also helps you understand the “why” behind each move — from proper layering to achieving the perfect fudgy texture. Whether it’s Valentine’s Day, an anniversary, or a Tuesday that just needs a little sweetness, these brownies bring pure chocolate bliss in every bite.
What to Serve with Heart Shaped Brownies
Heart Shaped Brownies are a dessert that pairs beautifully with simplicity. Serve them with a dollop of whipped cream, a drizzle of chocolate ganache, or a scoop of vanilla ice cream if you’re going for restaurant-level presentation. For something lighter, pair them with a fresh raspberry compote or a simple dusting of powdered sugar. If you’re planning a romantic dinner, these brownies make the perfect grand finale after a savory main course like Creamy Lemon Chicken Pasta. Add a candle, a playlist, and maybe a glass of wine — you’ve just turned dessert into a moment.
Key Tips for Making Heart Shaped Brownies
- Always use room-temperature cream cheese and eggs for a smoother texture.
- Strain the raspberry sauce to remove seeds — it gives a silkier finish.
- Don’t overbake! A slightly gooey center means fudgier brownies.
- Chill completely before cutting; cold brownies hold their shape better.
- For clean swirls, use a skewer or knife and make light, fluid motions.
- If you prefer less tang, swap raspberries for strawberries or cherries.
Storage and Reheating Tips for Heart Shaped Brownies
These brownies keep beautifully in the fridge for up to 5 days in an airtight container. To serve warm, microwave one piece for about 10 seconds — just enough to make the chocolate a little melty again. If you want to store them longer, freeze individually on a baking sheet, then transfer to a zip bag for up to 2 months. Thaw overnight in the fridge. The cheesecake layer stays creamy, and the brownie stays dense and rich — no weird texture changes. For Valentine’s gifting, wrap each heart in parchment and tie with ribbon for a homemade touch.
FAQs
Can I use frozen raspberries? Absolutely! Just thaw and drain them first.
Can I skip the cheesecake layer? You could, but that creamy tang really balances the chocolate.
What if I don’t have a heart-shaped cutter? No problem — cut them into squares and call them “modern love.”
Can I make this gluten-free? Yes! Just use a gluten-free flour blend — it works perfectly.
Final Thoughts
Heart Shaped Brownies are the kind of dessert that reminds us that love doesn’t have to be complicated — sometimes, it’s just chocolate, cheesecake, and raspberries baked into a warm, sweet expression. Whether you’re baking for someone special or treating yourself, these brownies deliver pure happiness in every bite. Want more Valentine’s inspiration? Check out Strawberry Cheesecake Truffle Balls — they’re as adorable as they are delicious.
Visit our Pinterest for regular slow cooker recipe updates, or join our Facebook discussions where cooking fans exchange their favorite hearty meal ideas.
Print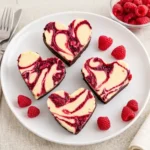
Heart Shaped Brownies Recipe – Rich, Fudgy, and Romantic
- Prep Time: 25 minutes
- Cook Time: 35 minutes
- Total Time: 3 hours
- Yield: 9 hearts 1x
- Category: Dessert, Valentine’s Treat
- Method: Baking
- Cuisine: American
- Diet: Vegetarian
Description
Rich, fudgy heart shaped brownies with creamy cheesecake topping and a swirl of tangy raspberry sauce — perfect for Valentine’s Day or any romantic occasion.
Ingredients
- 1 cup raspberries (fresh or thawed frozen)
- 1 tablespoon granulated sugar
- 1 teaspoon vanilla extract
- 8 oz cream cheese, room temperature
- ⅓ cup granulated sugar
- 1 large egg, room temperature
- ½ teaspoon vanilla extract
- 1 cup all-purpose flour (or gluten-free blend)
- ¾ cup Dutch-process cocoa powder, sifted
- ¼ teaspoon salt
- ¾ cup + 2 tablespoons refined coconut oil or neutral oil
- 1 ½ cups granulated sugar
- 1 tablespoon vanilla extract
- 3 large eggs, room temperature
Instructions
1. Simmer raspberries, sugar, and vanilla over medium heat for 5–8 minutes until thickened. Strain to remove seeds and set aside.
2. Beat cream cheese and sugar until smooth. Add egg and vanilla, then mix until creamy.
3. Whisk flour, cocoa, and salt in one bowl. In another, mix oil, sugar, and vanilla. Add eggs one by one. Combine both mixtures just until blended.
4. Spread brownie batter in lined pan. Pour cheesecake mixture on top. Spoon raspberry sauce over and swirl gently with a skewer.
5. Bake at 350°F for 30–35 minutes. Cool completely, then chill for 2 hours. Cut into heart shapes and serve.
Notes
Use room-temperature cream cheese and eggs for a smooth texture.
Strain the raspberry sauce to remove seeds for the best mouthfeel.
Chill completely before cutting into heart shapes.
For easy clean-up, line the baking pan with parchment paper that extends over the sides.
Nutrition
- Serving Size: 1 heart brownie
- Calories: 421
- Sugar: 35g
- Sodium: 90mg
- Fat: 25g
- Saturated Fat: 17g
- Unsaturated Fat: 7g
- Trans Fat: 0g
- Carbohydrates: 45g
- Fiber: 3g
- Protein: 5g
- Cholesterol: 75mg