Valentines Cookie Cups are the kind of dessert that’ll make even Cupid jealous. With soft peanut butter cookie bases, melty mini Reese’s tucked inside, and a sprinkle of heart-shaped love on top, these little bites are pure happiness in cookie form. Whether you’re baking for your kid’s school Valentine’s party, surprising your coworkers, or just having a fun family kitchen day, these cookie cups make everyone smile. They’re easy, quick, and dangerously good—you might “accidentally” eat a few before they even make it to the plate.
Table of Contents
What is Valentines Cookie Cups?
Valentines Cookie Cups are mini peanut butter cookies baked in a muffin tin, then filled with Reese’s peanut butter cups and topped with adorable heart sprinkles. They’re a playful twist on classic peanut butter blossoms, but with a gooey, candy-filled center instead of a Hershey’s Kiss. These bite-sized treats are chewy, rich, and the perfect mix of salty and sweet. Think of them as the Valentine’s Day cousin of your favorite peanut butter cookie—only cuter and way more fun to share.
Reasons to Try Valentines Cookie Cups
First, they’re easy. Like, “done-in-30-minutes” easy. If you’re juggling work, kids, and trying to find something festive to bring to a party, these are your go-to. Second, they look like something from a bakery window without the price tag. Finally, they’re kid-approved and adult-adored. You can get creative with toppings, swap in different candies, or even make them gluten-free. Plus, your kitchen will smell like a peanut butter dream. And if you’re looking for another sweet Valentine’s treat, try these heart-shaped cinnamon rolls for breakfast—they pair perfectly with coffee and cookie crumbs.
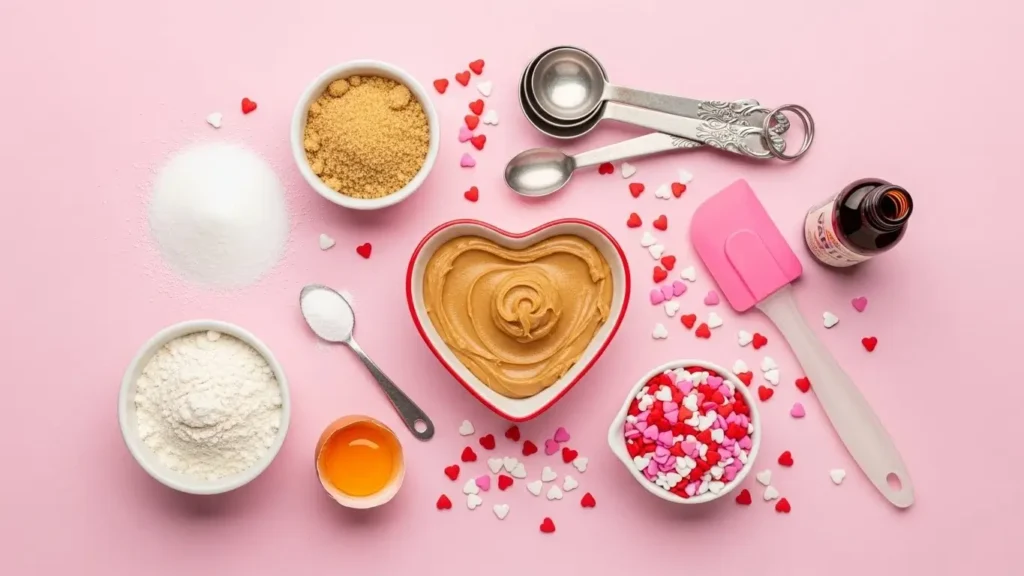
Ingredients Needed to Make Valentines Cookie Cups
- 6 tablespoons unsalted butter, softened
- ½ cup creamy peanut butter
- ½ cup brown sugar
- ½ cup granulated sugar
- ½ teaspoon vanilla extract
- 1 large egg
- ¾ teaspoon baking soda
- 1 ¼ cups all-purpose flour
Topping: - 30 Miniature Reese’s Peanut Butter Cups
- Jumbo Heart Sprinkles
Instructions to Make Valentines Cookie Cups (Step by Step)
Let’s walk through this step by step so you can bake the cutest (and tastiest) Valentines Cookie Cups without breaking a sweat. Even if you’re not much of a baker, this recipe will make you look like you belong on a Valentine’s Day dessert table next to a tray of Heart-Shaped Brownies.
Step 1: Gather and Prepare Your Ingredients
Before diving into mixing and baking, take a moment to set yourself up for success. Measure out all the ingredients and let your butter soften to room temperature. This makes creaming it with peanut butter much smoother and gives your cookie cups that dreamy, soft texture. If you’ve ever struggled with ingredient prep, check out our baking preparation tips — it’ll save you time (and cleanup!).
Make sure you’ve unwrapped all Mini Reese’s Peanut Butter Cups in advance. You’ll need to press them into the hot cookies right after baking, so having them ready avoids a chocolate meltdown panic.
Step 2: Cream the Butter, Peanut Butter, and Sugars
Now the fun begins! In a large bowl, use an electric mixer on medium speed to cream together your butter, peanut butter, brown sugar, and granulated sugar. This step by step process should take about 30 seconds until everything looks fluffy and lighter in color. The mixture should smell like warm peanut butter heaven.
Next, add the vanilla extract and one large egg. Mix again for about 10 seconds until everything blends together. This step helps build the base for the perfect chewy cookie texture. If your butter isn’t fully softened, don’t panic—just keep mixing until the lumps smooth out.
Step 3: Add the Dry Ingredients
Here’s where the baking science comes in. Sprinkle in your baking soda and mix on low speed for about 10 seconds. Then gradually add the all-purpose flour, one scoop at a time. Mixing too fast can make your dough dense, so take it step by step, watching the flour disappear before adding more.
When you’re done, the dough should pull away from the sides of the bowl easily and feel soft but not sticky. If it’s too wet, add one extra tablespoon of flour. Too dry? Add a teaspoon of peanut butter to bring it back to life.
Step 4: Shape the Cookie Dough
Grab a mini muffin tin (this is key—regular muffin pans make them too big) and lightly grease it with butter or a nonstick spray. Scoop about one tablespoon of dough for each cookie cup and roll it between your hands into small balls. Place each one into the muffin tin cavity.
For evenly shaped cookies, try using a cookie scoop. It’s a small trick, but it helps maintain size consistency for even baking. If you want more ideas for shaping dough or using tools efficiently, see our easy cookie-making hacks.
Step 5: Bake the Cookie Cups
Preheat your oven to 350°F and slide your muffin tin onto the middle rack. Bake for 8 minutes, or until the tops look set and the edges start to turn golden brown. The cookies should still look soft in the center—don’t overbake! They’ll firm up as they cool.
During this step by step process, keep an eye on the oven around the 7-minute mark. Every oven is different, and these little cookies can go from perfect to overdone fast.
Step 6: Add the Mini Reese’s Cups
Now for the best part! As soon as you pull the pan from the oven (while the cookies are still warm), press one Mini Reese’s Peanut Butter Cup right into the center of each cookie. You’ll feel the chocolate start to melt slightly—that’s exactly what you want.
After a few minutes, when the chocolate is glossy but not runny, place a heart sprinkle on top. The heat from the cookie will help it stick perfectly. If you’re baking with kids, this is the fun decorating moment where little hands can join in!
Step 7: Chill and Set
To keep that chocolate center smooth and pretty, transfer the entire muffin tin to your refrigerator for 10–15 minutes. This helps the Reese’s harden back up and keeps the cookie cups intact when removing them later.
Once the chocolate is firm, use the tip of a small spoon or butter knife to gently lift each cookie cup from the tin. Don’t rush—take it step by step, and they’ll come out beautifully without cracking.
Step 8: Cool, Serve, and Store
Let the cookie cups cool completely on a wire rack before serving. They’re irresistible warm, but even better once the chocolate fully sets. Serve them on a cute platter for Valentine’s Day parties, gift boxes, or even pack them as lunchbox surprises.
If you want to save some for later (though it’s hard not to eat them all!), store them in an airtight container at room temperature for up to 5 days. For longer storage, freeze them and just pop one out whenever you need a quick sweet pick-me-up.
For another step by step Valentine’s dessert that’s just as adorable, try these No-Bake Strawberry Cheesecake Bites. They pair perfectly with these cookie cups for a dessert platter that screams “love.”
What to Serve with Valentines Cookie Cups
These cookie cups play well with others. Serve them on a platter with chocolate-dipped strawberries or a bowl of pink M&Ms for extra flair. If you’re planning a Valentine’s brunch, they go great next to heart-shaped brownies or red velvet cinnamon rolls. For drinks, think milk, coffee, or a bubbly glass of rosé if you’re feeling fancy. They’re also perfect for classroom parties or dessert tables—no cutting or utensils needed.
Key Tips for Making Valentines Cookie Cups
- Use mini muffin tins, not standard ones—this keeps them perfectly bite-sized.
- Unwrap the Reese’s before baking. You’ll thank yourself later when you’re not racing the melting chocolate.
- Don’t overbake. They’ll continue to cook slightly in the tin.
- If the Reese’s start to sink too much, chill them briefly before pressing into the cookies.
- For a flavor twist, use white chocolate Reese’s or top with pink M&Ms instead of sprinkles.
Storage and Reheating Tips for Valentines Cookie Cups
Store your cookie cups in an airtight container at room temperature for up to 5 days. For longer storage, freeze them in a freezer-safe bag for up to 3 months. When you’re ready to enjoy, let them thaw at room temperature for 30 minutes—or pop them in the microwave for 8 seconds to get that soft, melty center again. If you’re prepping ahead for a party, make the dough a day early and refrigerate it, then bake fresh the next morning.
FAQs
Can I use crunchy peanut butter? You can, but creamy gives a smoother texture.
Do I need to chill the dough? Not for this recipe—just bake right away!
Can I substitute another candy? Absolutely! Try Hershey’s hearts or mini Rolos for a caramel twist.
Final Thoughts
Valentines Cookie Cups are a guaranteed way to win hearts (literally and figuratively). They’re easy, festive, and ridiculously good. Perfect for busy moms, party hosts, or anyone who believes chocolate and peanut butter were destined to be together. So grab your apron, preheat that oven, and make your kitchen smell like love.
Visit our Pinterest for regular slow cooker recipe updates, or join our Facebook discussions where cooking fans exchange their favorite hearty meal ideas.
Print
Valentines Cookie Cups
- Prep Time: 10 minutes
- Cook Time: 8 minutes
- Total Time: 30 minutes
- Yield: 30 cookies 1x
- Category: Dessert
- Method: Baking
- Cuisine: American
- Diet: Vegetarian
Description
Using mini Reeses peanut butter cups & adorable heart sprinkles, these cookies are perfect for office Valentines treats, school parties, or just as a fun baking activity to make with the kids!
Ingredients
- 6 tablespoons unsalted butter, softened
- ½ cup creamy peanut butter
- ½ cup brown sugar
- ½ cup granulated sugar
- ½ teaspoon vanilla extract
- 1 large egg
- ¾ teaspoon baking soda
- 1 ¼ cups all-purpose flour
- Topping:
- 30 Miniature Reeses Peanut Butter Cups (not the tiny “mini” ones)
- Jumbo Heart Sprinkles
Instructions
1. In a large bowl, cream together softened unsalted butter, peanut butter, brown sugar, and granulated sugar with an electric mixer on medium speed for 30 seconds.
2. Add in vanilla extract and egg and continue to mix for 10 seconds.
3. Add baking soda and mix on low speed for 10 seconds. Add flour and continue mixing until all is incorporated.
4. Scoop and roll dough into 1 tablespoon-sized balls and place each into a greased mini muffin tin.
5. Bake at 350℉ for 8 minutes. Remove from oven and immediately press one mini Reeses peanut butter cup into the center of each cookie.
6. After a few minutes, once the chocolate begins to melt, gently place a heart sprinkle onto the top of each one.
7. Place the pan in the refrigerator for 10–15 minutes to help the chocolate re-harden.
8. Allow to cool before removing cookies from the pan. Use the tip of a spoon to assist with easy removal.
9. Store in an airtight container for up to 5 days or freeze for longer storage.
Notes
Be sure to press the Reeses cup into the cookie immediately after baking for best results.
Add the heart sprinkle while chocolate is still soft so it adheres easily.
Chill the cookies briefly in the fridge to set the chocolate before serving.
These freeze beautifully—just thaw at room temperature before serving.
Perfect for Valentine’s parties, gifts, or festive family fun!
Nutrition
- Serving Size: 1 cookie
- Calories: 135
- Sugar: 8g
- Sodium: 70mg
- Fat: 8g
- Saturated Fat: 4g
- Unsaturated Fat: 3g
- Trans Fat: 0g
- Carbohydrates: 10g
- Fiber: 1g
- Protein: 2g
- Cholesterol: 12mg