Red Velvet Cinnamon Rolls are like wrapping Christmas morning in a warm, fluffy blanket of cocoa, sugar, and love. If your family’s anything like mine, holiday mornings are a mix of excitement, coffee refills, and a little bit of chaos. That’s exactly why this recipe is your new holiday hero. With that deep red hue and a swirl of spiced sweetness, these rolls aren’t just breakfast—they’re a celebration.
The smell alone might just wake the whole house. Whether you’re baking for family, friends, or just because it’s Tuesday and you deserve it, Red Velvet Cinnamon Rolls deliver that irresistible balance of indulgence and comfort. Pair it with a steaming mug of cocoa and you’ve got yourself pure joy on a plate.
Table of Contents
What is Red Velvet Cinnamon Rolls?
Red Velvet Cinnamon Rolls are a dreamy mashup of two favorites: the classic cinnamon roll and the rich, cocoa-kissed flavor of red velvet cake. Imagine that signature soft dough, dyed a festive red, rolled up with a cinnamon-chocolate filling that melts into gooey perfection. Then it’s topped with a silky sugar glaze that seeps into every crevice—sweet but not overbearing.
These rolls are perfect for holidays, brunches, or any day that calls for something a little special. The dough uses yeast, giving it that soft, bakery-style rise, while the cocoa powder and buttermilk give it that signature tang you know from red velvet desserts. If you’ve ever wanted your cinnamon rolls to feel a bit more fancy, this is it.
Reasons to Try Red Velvet Cinnamon Rolls
Let’s be honest—sometimes we need a recipe that just makes people say wow. Red Velvet Cinnamon Rolls do exactly that. First, they’re show-stoppingly beautiful. That rich red color peeking through layers of cinnamon and sugar looks like something straight out of a bakery window. Second, they taste incredible. The slight chocolate flavor mixed with warm cinnamon is a cozy, unexpected twist on a classic.
And third, they’re surprisingly easy to make. The dough comes together in one bowl, and the rise time gives you a chance to sip your coffee or wrap last-minute gifts. Plus, you can prep them the night before, refrigerate, and bake fresh in the morning. For anyone who loves sweet brunches, this is your “oh, I nailed it” moment.
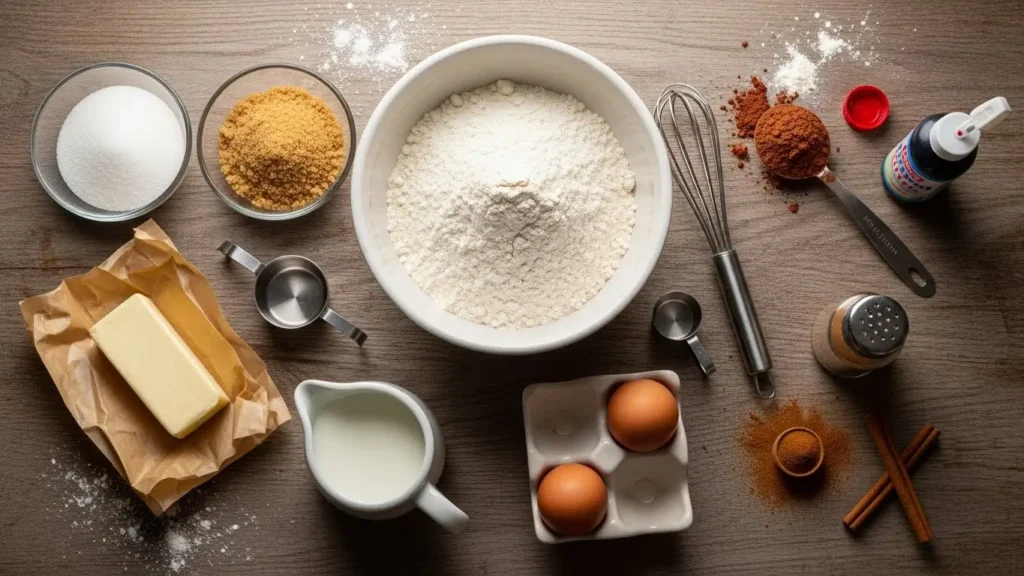
Ingredients Needed to Make Red Velvet Cinnamon Rolls
For the Dough:
- 3 ¼ cups all-purpose flour (plus extra for dusting)
- 2 ¼ teaspoons instant yeast
- ¾ cup warm milk (about 110°F)
- ¼ cup granulated sugar
- ¼ cup unsalted butter, softened
- 1 teaspoon salt
- 1 large egg
- 2 tablespoons unsweetened cocoa powder
- 2 teaspoons red food coloring (or more as desired)
- 1 tablespoon buttermilk
For the Filling:
- ½ cup brown sugar, packed
- 2 tablespoons granulated sugar
- 2 tablespoons unsweetened cocoa powder
- 2 teaspoons ground cinnamon
- ¼ cup unsalted butter, softened
For the Glaze:
- 1 cup powdered sugar
- 2 tablespoons milk (adjust for thickness)
- ½ teaspoon vanilla extract
Instructions to Make Red Velvet Cinnamon Rolls (Step by Step Guide)
If you’ve ever wanted to bake something that feels like a cozy bakery experience right at home, this Step by Step guide to making Red Velvet Cinnamon Rolls is your new best friend. Every detail is here—from activating the yeast to that first glorious drizzle of glaze—so even if you’re new to baking, you’ll be confidently rolling in no time. Grab your apron (and maybe your favorite holiday playlist), and let’s get started!
Step 1: Activate the Yeast (The Foundation of Fluffiness)
This first step by step process ensures your rolls rise perfectly light and airy. Warm your milk to about 110°F—that’s comfortably warm to the touch, not hot. Pour it into a bowl and stir in the instant yeast and a teaspoon of sugar. Let it rest for around 5 minutes. You’ll start to see small bubbles forming—this is your yeast waking up and getting ready to work its magic.
If nothing happens, your yeast might be inactive (it happens to the best of us). In that case, start fresh with a new packet. For more troubleshooting tips, check out our Cottage Cheese Alfredo recipe—it covers similar warm-liquid prep techniques that keep ingredients happy and active.
Step 2: Make the Dough (Where the Magic Begins)
In a large mixing bowl, combine 3 ¼ cups flour, ¼ cup sugar, 1 teaspoon salt, 2 tablespoons cocoa powder, and your red food coloring. Then, add your foamy yeast mixture, softened butter, egg, and buttermilk. Mix everything until a soft dough starts to form.
Now comes the fun part—kneading. Dust your countertop with flour and knead the dough for 7–8 minutes. It should feel soft and slightly tacky but not sticky. If it’s clinging to your hands, sprinkle in a bit more flour—one tablespoon at a time. The key in this step by step is patience. You’ll know you’re done when the dough feels smooth and elastic, like playdough that’s just right.
Baking Tip: Want to swap buttermilk for something lighter? Check out our guide on ingredient swaps inside High Protein Veggie Lasagna. You’ll find great dairy alternatives that work beautifully in baking too.
Step 3: First Rise (Let It Double in Joy)
Transfer your dough into a greased bowl, turning it once so it’s lightly coated in oil (this keeps it from drying out). Cover the bowl with a clean kitchen towel and set it in a warm, draft-free spot. Let it rise for about 1 hour, or until it doubles in size.
This step by step rise is essential for that soft, bakery-style texture. A trick? Place it in a slightly warm (but turned off) oven—it speeds things up without overdoing it.
While the dough rises, take a breather or prep your filling. If you’re meal prepping for a busy morning, you can also check out our One-Pot Creamy Beef and Shells for another cozy make-ahead favorite.
Step 4: Make the Filling (Sweet Meets Spiced)
While your dough is rising, prepare that irresistible cinnamon-chocolate filling. In a small bowl, mix ½ cup packed brown sugar, 2 tablespoons granulated sugar, 2 tablespoons cocoa powder, and 2 teaspoons cinnamon. Set aside ¼ cup softened butter for spreading later.
This combination gives your rolls a rich, aromatic center that melts perfectly as they bake. For an extra punch of flavor, you can add a pinch of nutmeg or a drizzle of vanilla extract—it gives a warm, festive twist.
Step 5: Roll and Fill (Where the Swirl Comes Alive)
Once your dough has doubled, punch it down gently to release the air. Roll it out on a floured surface into a 12×16-inch rectangle—thinner dough equals tighter, more beautiful swirls. Spread your softened butter evenly over the surface, leaving a small border on the edges. Then sprinkle your sugar mixture evenly across the buttered dough.
Here’s where things get fun: starting from the long edge, roll the dough tightly into a log. Use both hands to keep the roll even. For perfect, clean slices, grab some unflavored dental floss—yes, floss! Slide it under the roll, cross the ends, and pull to cut through without squishing. It’s a baker’s best-kept secret.
If you enjoy this step by step baking style, you’ll love our Strawberry Cheesecake Truffle Balls, which also rely on layering and rolling for a beautiful presentation.
Step 6: Second Rise (Patience, Part Two)
Place your 12 slices into a greased 9×13-inch baking pan, leaving just a bit of space between each roll. Cover the pan and let the rolls rise again for 30–40 minutes. They’ll puff up and nearly touch—don’t skip this second rise! It’s what gives you that ultra-soft, pull-apart texture.
During this step by step, preheat your oven to 350°F (175°C) so it’s ready to go once your rolls are. The smell of these beauties rising is your cue that you’re about to bake something amazing.
Step 7: Bake to Perfection (Golden, Soft, Heavenly)
When your rolls look puffy and full of promise, bake them in your preheated oven for 20–25 minutes, or until the tops are lightly golden and the centers are just set. Be careful not to overbake—overdoing it will dry them out.
If you’re unsure, gently tap the top of a roll—it should spring back softly. While they bake, your kitchen will fill with the sweet scent of cocoa and cinnamon—arguably one of the best holiday smells there is.
If you love these aromas, check out our Sticky Garlic Chicken Noodles. Different flavor profile, same level of comfort.
Step 8: Glaze and Serve (The Final Touch of Bliss)
Whisk together 1 cup powdered sugar, 2 tablespoons milk, and ½ teaspoon vanilla extract until smooth. Adjust the thickness by adding a bit more sugar for a thicker glaze or more milk for a drizzle consistency.
Pour it generously over your warm rolls and let it cascade down each swirl. This step by step moment transforms your Red Velvet Cinnamon Rolls from “delicious” to “can’t-stop-eating.”
If you want to get creative, try a cream cheese glaze instead of plain sugar—it adds a tangy richness that complements the red velvet flavor perfectly.
And there you have it—Red Velvet Cinnamon Rolls Step by Step, from the first whisk to the final drizzle. Whether it’s Christmas morning or a lazy weekend brunch, these rolls bring comfort, color, and a touch of magic to your table.
What to Serve with Red Velvet Cinnamon Rolls
These rolls are the main attraction, but they pair wonderfully with breakfast classics. A hot mug of coffee or cocoa makes them sing. Add a side of crispy bacon for that salty-sweet balance everyone secretly loves. If you’re going for a full Christmas morning spread, serve them alongside a veggie-packed egg casserole or Chicken and Spinach Casserole with Cream Cheese for something savory. For a refreshing contrast, try a bowl of fresh berries or a light fruit salad. Basically, anything that makes you feel cozy and festive works here.
Key Tips for Making Red Velvet Cinnamon Rolls
- Warm but not hot milk — Yeast is alive, so don’t kill it with overly hot milk. Think “baby bath” warm.
- Don’t skip the rise time. Letting the dough double is what makes it soft and fluffy.
- Color control. Add more food coloring if you want that deep red hue—just avoid overdoing it.
- Dental floss slicing hack. It keeps your rolls round instead of squished.
- Make ahead. Prepare and refrigerate overnight, then bake in the morning for effortless freshness.
Storage and Reheating Tips for Red Velvet Cinnamon Rolls
If you’re lucky enough to have leftovers, store them in an airtight container at room temperature for up to 2 days or in the fridge for 4 days. To reheat, pop them in the microwave for about 15–20 seconds or in the oven at 300°F for 10 minutes. Want that just-baked freshness? Brush a tiny bit of butter on top before reheating. You can also freeze unglazed rolls for up to 2 months—just thaw overnight and glaze before serving.
FAQs
Can I make these without food coloring? Absolutely. They’ll still taste amazing—just less red.
Can I use cream cheese frosting instead of glaze? Yes! It’s a fantastic upgrade if you prefer richer rolls.
Can I use a stand mixer? Definitely. It saves time and keeps your hands clean.
Can I make them vegan? Try plant-based milk, vegan butter, and a flax egg. They still come out soft and delicious.
Final Thoughts
There’s something magical about Red Velvet Cinnamon Rolls—they’re festive, indulgent, and filled with nostalgia. Whether it’s Christmas morning or just a lazy weekend, these rolls bring warmth, color, and that unmistakable homemade comfort. The best part? They’re easy enough for beginners but impressive enough for guests. So go ahead—tie up your apron, preheat that oven, and make your kitchen smell like holiday magic.
Visit our Pinterest for regular slow cooker recipe updates, or join our Facebook discussions where cooking fans exchange their favorite hearty meal ideas.
Print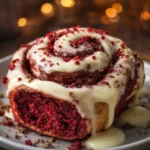
Red Velvet Cinnamon Rolls | The Perfect Christmas Morning Treat
- Prep Time: 30 minutes
- Cook Time: 25 minutes
- Total Time: 2 hours 10 minutes
- Yield: 12 rolls 1x
- Category: Rolls
- Method: Baking
- Cuisine: American
- Diet: Vegetarian
Description
Soft, rich, and festive, these Red Velvet Cinnamon Rolls are a stunning twist on a classic favorite. With cocoa-infused red dough, a sweet cinnamon filling, and a vanilla sugar glaze, they’re the perfect Christmas morning treat.
Ingredients
- For the Dough:
- 3 ¼ cups all-purpose flour (plus extra for dusting)
- 2 ¼ teaspoons instant yeast
- ¾ cup warm milk (about 110°F)
- ¼ cup granulated sugar
- ¼ cup unsalted butter, softened
- 1 teaspoon salt
- 1 large egg
- 2 tablespoons unsweetened cocoa powder
- 2 teaspoons red food coloring (or more as desired for color)
- 1 tablespoon buttermilk
- For the Filling:
- ½ cup brown sugar, packed
- 2 tablespoons granulated sugar
- 2 tablespoons unsweetened cocoa powder
- 2 teaspoons ground cinnamon
- ¼ cup unsalted butter, softened
- For the Sugar Glaze:
- 1 cup powdered sugar
- 2 tablespoons milk (add more if needed)
- ½ teaspoon vanilla extract
Instructions
1. Warm the milk to about 110°F, then add the yeast and a teaspoon of sugar. Let it sit for 5 minutes until it becomes foamy.
2. In a large mixing bowl, combine flour, sugar, salt, cocoa powder, and red food coloring. Add in the yeast mixture, softened butter, egg, and buttermilk. Mix until a soft dough forms.
3. If the dough feels too sticky, add an extra tablespoon of flour at a time. Knead the dough for 7–8 minutes on a lightly floured surface until smooth and elastic.
4. Place the dough in a greased bowl, cover it with a clean towel, and let it rise in a warm spot for about 1 hour or until doubled in size.
5. While the dough rises, mix the brown sugar, granulated sugar, cocoa powder, and cinnamon together in a small bowl. Set aside the softened butter for spreading.
6. Once the dough has risen, punch it down gently to release air. Roll it out into a rectangle about 12×16 inches on a floured surface. Spread the softened butter evenly across the dough, then sprinkle the cinnamon sugar filling mixture over the top.
7. Starting from the long side, roll the dough tightly into a log. Use a sharp knife or unflavored dental floss to cut it into 12 equal slices.
8. Arrange the slices in a greased 9×13-inch baking dish, leaving a little space between each roll. Cover and let them rise again for 30–40 minutes until puffy.
9. Preheat the oven to 350°F (175°C). Bake the rolls for 20–25 minutes until golden on top and cooked through.
10. Whisk together the powdered sugar, milk, and vanilla extract until smooth. Adjust consistency as needed.
11. Drizzle the warm rolls generously with the sugar glaze. Serve immediately while warm and soft.
Notes
If you want deeper red color, feel free to increase the red food coloring slightly.
Be careful not to overbake the rolls to maintain their soft texture.
These can be made a day ahead and warmed slightly before serving.
Add cream cheese to the glaze for a tangier finish.
Nutrition
- Serving Size: 1 roll
- Calories: 330
- Sugar: 22g
- Sodium: 160mg
- Fat: 10g
- Saturated Fat: 6g
- Unsaturated Fat: 3g
- Trans Fat: 0g
- Carbohydrates: 52g
- Fiber: 2g
- Protein: 5g
- Cholesterol: 40mg