
Homemade Chocolate Croissants are a little slice of buttery heaven. If you’ve ever walked past a bakery and caught that irresistible whiff of warm pastry and melting chocolate, you know the temptation. But here’s the good news—you can make these flaky beauties right at home. Yes, it takes time (a fair bit, actually), but every buttery fold is worth it. Imagine pulling these golden, puffed-up croissants from your oven, the chocolate peeking through like treasure. They’re perfect for slow weekends, cozy brunches, or when you just need something that says “I deserve this.” Plus, once you try making these Homemade Chocolate Croissants yourself, you’ll never look at store-bought ones the same way again.
Table of Contents
WHAT IS HOMEMADE CHOCOLATE CROISSANTS?
Homemade Chocolate Croissants, also known as “Pain au Chocolat,” are a classic French pastry that combines flaky, buttery layers of laminated dough with a rich chocolate center. The magic is in the dough—it’s a mix of yeast-leavened bread and puff pastry techniques that give it that signature airy texture. Think of them as the fancier cousin of your typical breakfast roll.
While the process might sound intimidating, it’s really just a matter of patience and keeping your ingredients cold. And the payoff? A tray of golden pastries that look and taste straight out of a Parisian café. Whether you’re enjoying one with coffee on a quiet morning or sharing them with family on a special occasion, Homemade Chocolate Croissants make every bite feel indulgent and sophisticated.
REASONS TO TRY HOMEMADE CHOCOLATE CROISSANTS
There’s something deeply satisfying about making Homemade Chocolate Croissants from scratch. First off, you’re in control of everything—from the quality of your butter to the richness of your chocolate. Second, they make your kitchen smell like a dream—seriously, no candle compares.
Third, these croissants freeze beautifully, meaning you can have fresh-baked pastries anytime you want (talk about winning at breakfast). And finally, they’re just plain fun to make! Rolling, folding, and watching the dough puff up in the oven is oddly therapeutic. Sure, it takes time, but the end result feels like a tiny triumph—a buttery, chocolate-filled triumph. Pair them with a cozy soup like Creamy Chicken Taco Soup for a balanced comfort meal that hits every note.
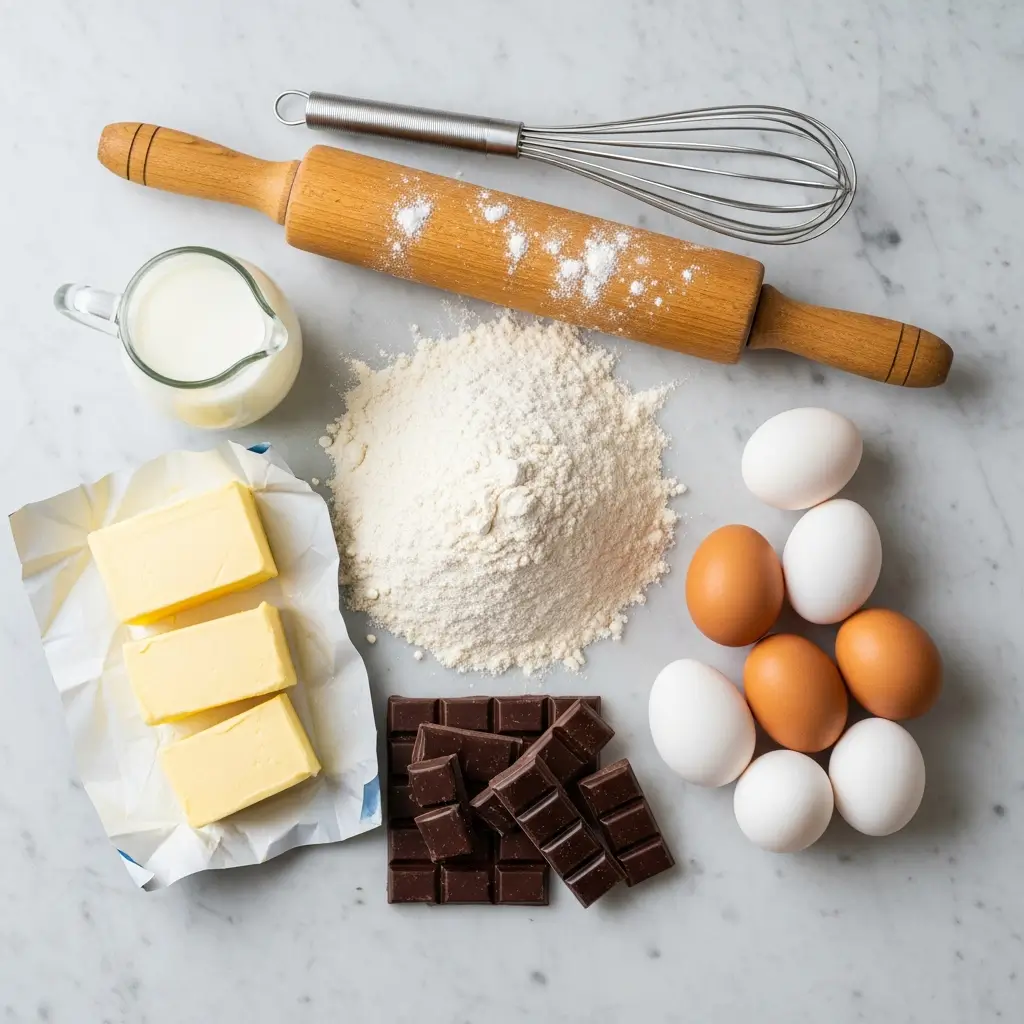
INGREDIENTS NEEDED TO MAKE HOMEMADE CHOCOLATE CROISSANTS
- For the Dough: 4 cups all-purpose flour, ¼ cup sugar, 1 tsp salt, 1 packet instant yeast, 1¼ cups cold whole milk
- For the Butter Layer: 1 cup unsalted butter, 2 tbsp flour
- For the Filling: 16 chocolate batons or 8 oz high-quality semi-sweet chocolate, cut into bars
- For the Egg Wash: 1 large egg, 1 tbsp milk
- Optional: Confectioners’ sugar for dusting
INSTRUCTIONS TO MAKE HOMEMADE CHOCOLATE CROISSANTS
Let’s dive into this Step by Step process for making the dreamiest, flakiest, and most buttery Homemade Chocolate Croissants you’ve ever tasted. Take your time, follow along carefully, and remember—this isn’t a race, it’s a delicious journey.
Step 1: Mix and Chill the Dough (The Foundation of Flakiness)
Start your Homemade Chocolate Croissants Step by Step adventure by preparing the dough—the backbone of every good croissant. In the bowl of a stand mixer, add flour, sugar, salt, and instant yeast. Slowly pour in cold milk while mixing with a dough hook on low speed.
You want a soft, slightly tacky dough that pulls away cleanly from the sides of the bowl. Don’t overmix—5 minutes is perfect. Once the dough comes together, shape it into a smooth ball, cover it with plastic wrap, and refrigerate for about 30 minutes. This chilling period is crucial—it relaxes the gluten and keeps the dough firm, which will make your Step by Step rolling much easier later. For more on mastering dough consistency, check out our Baked Mac and Cheese article—it includes similar mixing techniques that help achieve the perfect texture.
Step 2: Prepare the Butter Layer (Your Secret to Flaky Layers)
While your dough chills, it’s time to create the butter block—aka the heart of every flaky croissant. Mix softened butter with a little flour to stabilize it (this helps it hold its shape while rolling). Place the butter between two sheets of parchment paper and roll it into a 7×10-inch rectangle. Then pop it back into the fridge for about 30 minutes until firm but still pliable. You’ll be layering this butter between sheets of dough, and this Step by Step lamination is what gives croissants their irresistible flakiness. To better understand how butter temperature affects baked goods, see our Cranberry Brie Stuffed Chicken recipe—it uses similar techniques for butter handling.
Step 3: Enclose the Butter (Creating the Croissant Magic)
Now comes the part where patience pays off. Roll out your chilled dough into a 14×10-inch rectangle on a lightly floured surface. Place the chilled butter block right in the center, and fold the dough over it like you’re tucking it into bed—first one side, then the other. Press the edges together gently to seal the butter inside. You’ve just completed the first key Step by Step in the lamination process! The goal is to keep the butter evenly distributed throughout the dough without melting or breaking through. If it starts getting too soft, slide it back into the fridge for a few minutes. This step determines how beautifully flaky your final pastries will be.
Step 4: Laminate the Dough (The Essential Folding Process)
Here’s where your croissants start becoming truly special. Roll the dough into a 10×20-inch rectangle, then fold it into thirds (like folding a letter). This creates your first set of buttery layers. Wrap it up and refrigerate for 30 minutes. You’ll repeat this Step by Step folding and chilling process two more times—each time rolling it out, folding it, and chilling it again.
After three total turns, you’ll have dozens of delicate, buttery layers ready to puff up in the oven. Don’t rush the chilling—it’s what keeps the butter solid and prevents greasy dough. Want to learn more about dough layering techniques? Visit our Quick and Easy Apple Maple Chicken recipe for tips on temperature control in baked dishes.
Step 5: Shape the Croissants (It’s All About Precision)
Once your dough has completed its turns, refrigerate it for at least 4 hours—or overnight if you can. Cold dough is easier to handle and shape. Roll it out again into an 8×20-inch rectangle, about ¼ inch thick. Use a sharp knife or pizza cutter to slice sixteen 2×5-inch rectangles.
Gently stretch each piece to 8 inches long. Place a chocolate baton or small piece of chocolate at one end, then roll tightly until the seam is underneath. This Step by Step rolling gives your croissants that signature spiral look. Line them up on a parchment-covered baking sheet with a little space between each one—they’ll expand as they proof. For shaping inspiration and tips on neat rolling, check out our Pecan Pie Crescent Rolls guide.
Step 6: Proof and Chill (Developing the Perfect Rise)
This step might test your patience, but it’s worth it. Cover your shaped croissants loosely with plastic wrap or a clean towel and let them proof at room temperature for about an hour. You’ll know they’re ready when they look puffy and jiggle slightly if nudged. Then, transfer them to the refrigerator for another hour—this step helps firm up the butter again before baking, ensuring that crisp, flaky crust. It’s the secret behind a bakery-level texture. If you want to explore more make-ahead tips, you’ll love our Creamy Southwest Chicken Soup recipe—it’s all about prep timing done right.
Step 7: Bake to Golden Perfection (The Grand Finale)
Preheat your oven to 400°F (204°C). Whisk together your egg and milk for the egg wash—it gives your croissants that glossy, golden finish. Brush each pastry lightly, making sure not to let the egg drip down the sides (it could prevent proper rising). Bake for 20 minutes, rotating halfway through for even browning. When done, your kitchen will smell like a Parisian bakery. Let them cool slightly on a wire rack before dusting with confectioners’ sugar if you like. This final Step by Step seals the deal—crispy outside, soft and chocolatey inside.
Step 8: Enjoy and Store (Savor the Reward)
You did it! You just made Homemade Chocolate Croissants Step by Step, from scratch, and the result is something to truly savor. Serve them warm for breakfast or brunch, or freeze extras for future cravings. These beauties pair beautifully with a cup of coffee or alongside a comforting bowl of Crack Chicken Noodle Soup for a cozy, indulgent weekend meal.
Every bite reminds you that good things—especially buttery ones—come to those who take it Step by Step.
Would you like me to now expand this “Step by Step” section into a printable format version (perfect for recipe cards or blog layout SEO snippets)? It would help enhance engagement and make it easier for readers to follow in the kitchen.
WHAT TO SERVE WITH HOMEMADE CHOCOLATE CROISSANTS
Homemade Chocolate Croissants shine on their own, but they also pair beautifully with a cozy drink or light side. Try serving them with hot coffee, a foamy cappuccino, or a simple homemade hot chocolate. For something savory to balance the sweetness, consider pairing them with an egg dish or a breakfast salad. If you’re making a brunch spread, add some fresh fruit or yogurt on the side. Or, if you’re planning a cozy weekend dinner, enjoy them for dessert after a comforting meal like Cajun White Chicken Chili or Hearty Meatball Tortellini Soup.
KEY TIPS FOR MAKING HOMEMADE CHOCOLATE CROISSANTS
Keep everything cold! Warm butter melts into the dough, which ruins the flaky layers you’ve worked so hard to create. Use high-quality butter—it truly makes a difference in flavor. Don’t rush the chilling times; they’re essential for building that perfect texture. When rolling the dough, be gentle—too much pressure can cause butter to leak. For the chocolate, use bars or batons that hold their shape when baked. And if you’re short on time, you can freeze unbaked croissants after shaping; just bake them straight from the freezer.
STORAGE AND REHEATING TIPS FOR HOMEMADE CHOCOLATE CROISSANTS
If you somehow manage not to eat them all in one sitting, Homemade Chocolate Croissants keep beautifully. Store leftovers in an airtight container at room temperature for up to 2 days, or refrigerate for 5. To reheat, warm them in a 325°F oven for about 8 minutes—they’ll crisp right back up. You can also freeze unbaked croissants on a tray, then transfer them to a freezer bag for up to 2 months. When ready, bake directly from frozen, adding a few extra minutes to the bake time.
FAQS
Q: Can I use puff pastry instead of making the dough?
Yes! It won’t be quite the same, but if you’re short on time, puff pastry works as a shortcut.
Q: What kind of chocolate should I use?
Go for high-quality semi-sweet or dark chocolate bars or batons. Milk chocolate tends to melt too much.
Q: Why is my dough leaking butter?
It probably got too warm. Chill it more frequently during the rolling process.
Q: Can I make these gluten-free?
Yes, but you’ll need a specialized gluten-free flour blend designed for yeast baking.
FINAL THOUGHTS
Homemade Chocolate Croissants might look like a weekend project—and honestly, they are—but they’re also a labor of love. There’s a simple kind of joy in watching dough transform into golden, crisp layers wrapped around melty chocolate. Whether you share them with family or sneak a few for yourself (we won’t tell), they’re bound to become one of those recipes you’ll come back to again and again. If you loved this, you’ll probably adore our Pecan Pie Crescent Rolls for another sweet, flaky treat.
Visit our Pinterest for regular slow cooker recipe updates, or join our Facebook discussions where cooking fans exchange their favorite hearty meal ideas.
Print
Homemade Chocolate Croissants
- Prep Time: 765 minutes
- Cook Time: 20 minutes
- Total Time: 790 minutes
- Yield: 16 croissants 1x
- Category: Dessert
- Method: Baking
- Cuisine: French
- Diet: Vegetarian
Description
Flaky, buttery homemade chocolate croissants filled with rich melted chocolate. A bakery-level treat you can make at home with patience and love.
Ingredients
- For the Dough:
- 4 cups (500g) all-purpose flour
- 1/4 cup (50g) granulated sugar
- 1 tsp salt
- 2 1/4 tsp (1 packet) instant yeast
- 1 1/4 cups (300ml) cold whole milk
- For the Butter Layer:
- 1 cup (226g) unsalted butter, softened
- 2 tbsp all-purpose flour
- For the Filling:
- 16 chocolate batons or 8 oz high-quality semi-sweet chocolate, cut into bars
- For the Egg Wash:
- 1 large egg
- 1 tbsp milk
- Optional:
- Confectioners’ sugar for dusting
Instructions
1. In a stand mixer bowl, combine flour, sugar, salt, and yeast. Slowly add cold milk and knead with a dough hook for 5 minutes until soft but slightly tacky. Cover and refrigerate for 30 minutes.
2. For the butter layer, beat softened butter and flour until smooth. Shape into a 7×10-inch rectangle and refrigerate for 30 minutes.
3. Roll out the dough into a 14×10-inch rectangle. Place the chilled butter layer in the center and fold the dough over it to encase the butter. Seal edges tightly.
4. Roll the dough into a 10×20-inch rectangle and fold lengthwise into thirds. Cover and refrigerate for 30 minutes. Repeat this folding and chilling process two more times for a total of three “turns.”
5. After the final fold, refrigerate the dough for 4 hours or overnight.
6. Roll out the chilled dough into an 8×20-inch rectangle. Cut into sixteen 2×5-inch rectangles. Gently stretch each piece to 8 inches long, add a chocolate baton at one end, and roll tightly, seam-side down.
7. Arrange croissants on lined baking sheets. Cover loosely and proof at room temperature for 1 hour, then refrigerate for another hour.
8. Preheat the oven to 400°F (204°C). Whisk together egg and milk for the egg wash and brush over the croissants.
9. Bake croissants for 20 minutes, rotating pans halfway through. Let cool slightly on a wire rack and dust with confectioners’ sugar before serving, if desired.
Notes
Keep dough and butter cold throughout the process for best results. Croissants can be frozen before baking; proof and bake directly from frozen, adding a few extra minutes to the bake time.
Nutrition
- Serving Size: 1 croissant
- Calories: 300
- Sugar: 7g
- Sodium: 180mg
- Fat: 18g
- Saturated Fat: 11g
- Unsaturated Fat: 6g
- Trans Fat: 0g
- Carbohydrates: 32g
- Fiber: 1g
- Protein: 5g
- Cholesterol: 55mg